
Run your charger in Home Assistant
The APREVSE charger speaks a plain HTTP + WebSocket API on your LAN, so it drops straight into Home Assistant. Our custom integration talks to the device locally — no cloud round-trip, no account, no MQTT broker. State is pushed live over a WebSocket; commands go straight to the charger on your network. It also runs the other way: your car and home battery readings can be pushed from Home Assistant into the charger, so it charges on data it could never reach by itself.
This guide installs the Home Assistant integration through HACS and gets your charger on the dashboard in about five minutes.
Before you start#
- Home Assistant 2024.12 or newer.
- HACS installed in your Home Assistant.
- The charger powered on and on the same LAN as Home Assistant. Note its IP if you can — most setups auto-discover it, but a static lease saves headaches.
1. Add the custom repository to HACS#
The integration isn’t in the default HACS store yet, so add the repository:

Or add it manually.
In Home Assistant: HACS → the ⋮ menu (top-right) → Custom repositories.
Paste the repository URL, pick Integration as the category, and click Add:
https://github.com/apreb/mb-homeassistant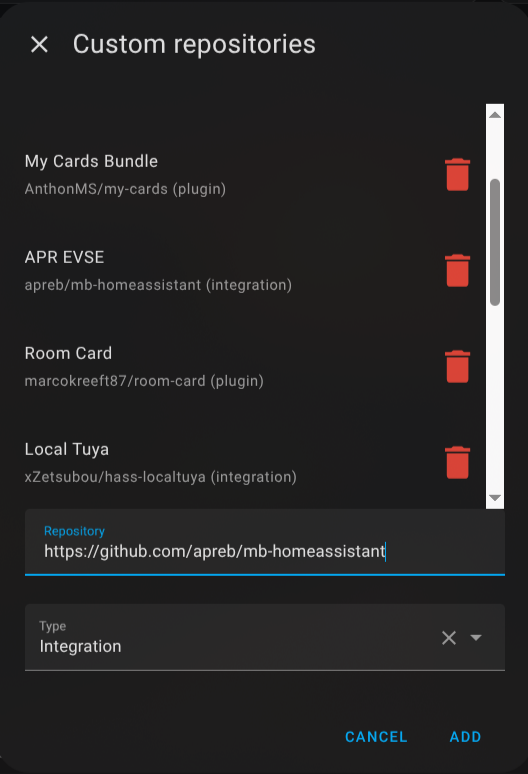
2. Install and restart#
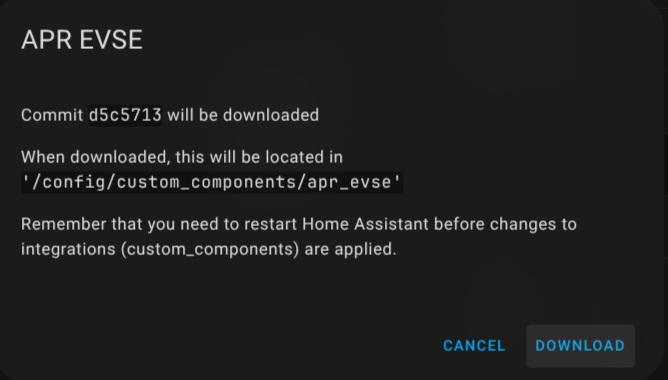
The APR EVSE card now shows up in HACS. Open it, click Download, and confirm. When the download finishes, restart Home Assistant so it loads the new integration.
3. Add the charger#
There are two ways in — pick whichever fires first.
Auto-discovery (zeroconf). After the restart, Home Assistant usually finds the charger by itself and drops a card under Settings → Devices & Services. Click Configure and confirm.
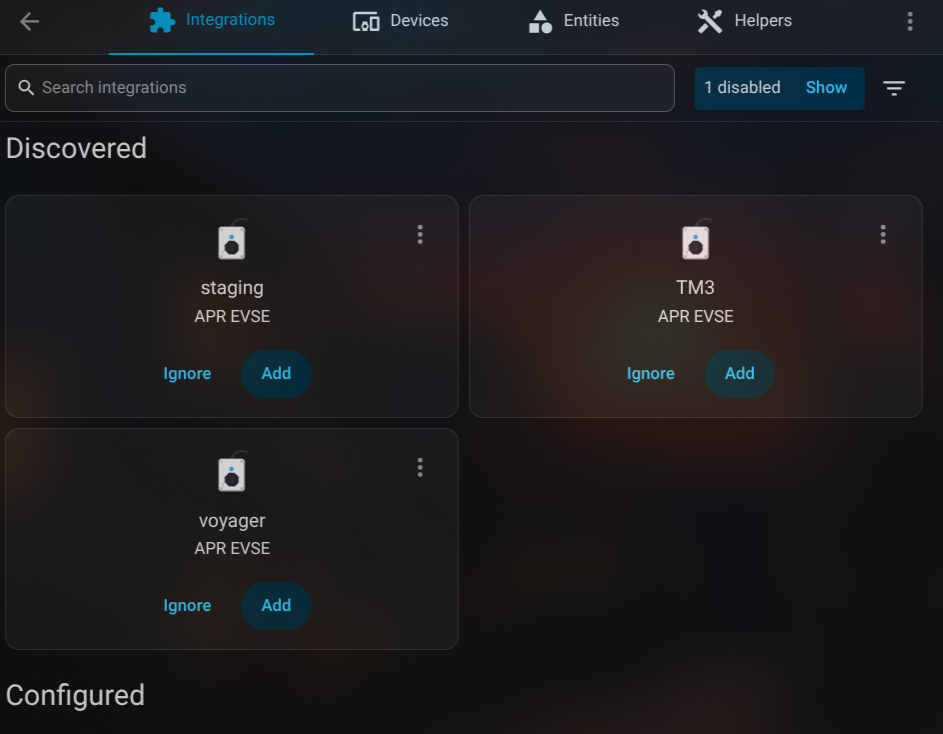
Manual. If it isn’t discovered, add it yourself: Settings → Devices &
Services → Add Integration → APR EVSE, then enter the charger’s host or IP
(port 80 by default).
That’s it — the device and all its entities appear immediately.
4. Send car and home battery data to the charger#
Requires charger firmware 2.2.+ or newer.
Point the integration at the Home Assistant sensors holding your car’s state of charge, your home battery’s state of charge and your inverter’s current, and this charger receives their values automatically. Settings → Devices & Services → APR EVSE. Each EVSE has its own Configure option.
| Option | What the charger does with it | When it’s sent |
|---|---|---|
| Car battery level (%) | Feeds the Use car SOC constraint | on every change, valid 24 h |
| Home battery level (%) | Home battery SOC for Solar charge mode | on change, then repeated on the interval |
| Inverter current (A, signed) | Output AC current of the inverter | with the battery level |
| Home battery send interval | Repeat rate for the two above (1-60 s, default 5) | — |
| Log every value sent | One line per push in Settings → System → Logs, for troubleshooting | — |
Three things worth knowing:
- If you picked an inverter current sensor: set the same polling value as the source sensor, and make both as fast as possible — ideally 1-5 s. The charger follows that value to manage its limits, so a slow feed makes it react late. Battery level on its own is fine at 30-60 s. Never longer — the charger discards the data after 60 s.
- The inverter current is signed, and the sign counts. Positive means the inverter is injecting, negative means it’s charging the home battery.
- A broken source stops the pushes on purpose. If the sensor goes
unavailableor non-numeric, nothing is sent, the charger expires the value and falls back to its own logic instead of acting on a stale reading.
Skip the home battery options if the charger already polls a local inverter — both write the same state and the last writer wins. Running several chargers? Each has its own Configure page, so just repeat this per device.
What you get#
One device with everything wired up:
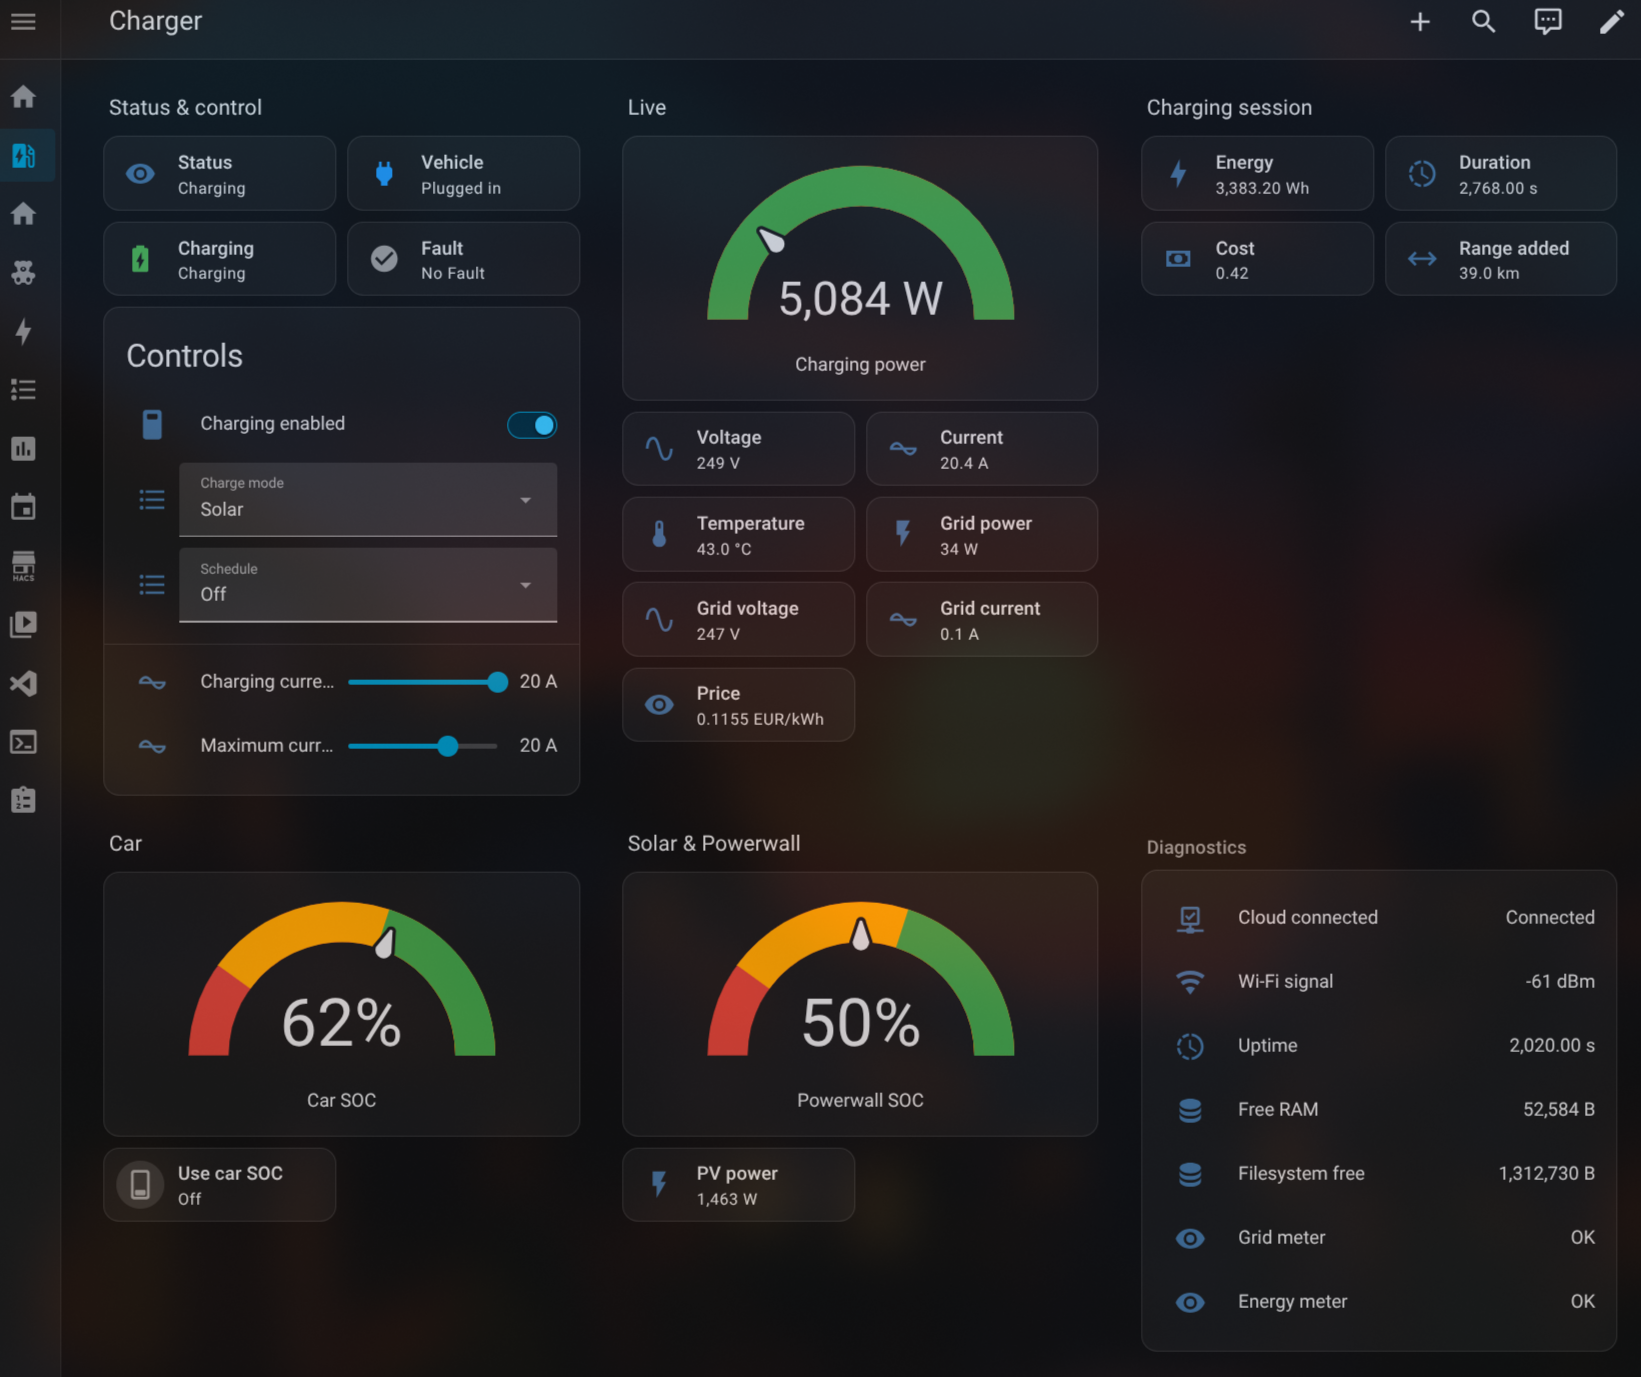
- Controls — charging current and maximum charging current, charge mode (Normal / Solar), schedule, and switches for charging enabled and use car SOC.
- Sensors — status, charging / grid / PV power, session energy, duration, cost and range added, voltage, temperature, and the current electricity price.
- Binary sensors — vehicle connected, charging, fault.
- Diagnostics — Wi-Fi signal, uptime, free RAM and filesystem, meter status, MAC address and firmware version.
Car SOC, home battery SOC, and PV power ship disabled by default — most installs don’t have those sources. Enable them on the device page if you do.
From here it’s all native Home Assistant: drop the entities on a dashboard, wire them into automations, chart your sessions.
Looking for inspiration? You can also drop in the example dashboard that wires up every entity the integration exposes in Home Assistant.
Found a bug or want a feature? Open an issue.